Cycle garage – repair your bike in the garden in your asgard bike garage!

The Asgard cycle maintenance store gets the thumbs up!

A little while back Asgard had a customer contact them about how they had used one of our biggest sheds as a bike maintenance shed.  Asgard are not ones to ignore a customer!  So they have asked this customer to keep them updated as to how he got on using it through the “summer” …

“Hi Tracey

As promised he is my update on your shed/my bike shop! It’s a bit long, but you asked me to be honest.

Putting down a base.

As you know as I really pleased with the original delivery, the unit was on time… even though I had forgotten to get my base down in time.  So your delivery lads carefully stacked the unit in my garden for me.

My base was down a week later – at a cost of £100 + VAT.  I used a local concrete firm who came along and simply poured a few cubic meters of concrete into a hole I had dug.  The process took about 20 mins, no mixing concrete by hand for me! That’s my top tip for anyone thinking of buying one of these big Asgard units and needs a base putting down.  Mixing concrete for a base 2.2 x 2.2 x 100mm deep is a lot of heavy mixing work.  I worked out the cost for this would be £70 in materials and mixer hire, it just made no sense to do the work myself.

Construction

I won’t lie to you, when you lay out all the bits and look at the number of screws, this looks like one intimidating piece of kit.  The saving grace is the instruction sheet, looks a bit like an engineering manual, but is actually really clear and easy to use.  The stickers on each panel identifying what they are is a touch of genius,  as at first glance all of the panels looked the same to me.

Building this metal unit is heavy work, this being one of your biggest sheds I can see why you recommend 2 people carry out this task.  The sides are easy enough to pick up and manoeuvre, though it is near impossible to hold two sides at once and screw then into the base. Believe me I tried.  The front fascia’s are light and easy to manoeuvre, when you get onto the doors though you are in to a different world.  They were heavy things.  Due to the raised base lip you need to lift the door about 10mm off the base to get the hinges to line up with the fixing holes.  10mm is not much, but takes a fair bit of effort to hold a door steady !

I didn’t bother bolting down the unit, I know this would give me increased security, but lets face it, this shed is immensely heavy.   No one will move this.  Besides I have a ground anchor, which will bolt down through the base to act as a secure point.

Finally the roof.  I thought the doors were awkward!  The roof and top cap really needs to built on the ground and then lifted onto the shed.  We tried to build the roof ON the shed.  No chance. The roof is integral to keeping the shed perfectly square, so lowering it, squaring it up and screwing together all at once is impossible.  Two aborted attempts led  to the conclusion that we should build it on the lawn then lower into position.  That worked a treat.  A tip here would be watch the fingers! When the roof suddenly drops into place on the shed it drops an inch down onto the walls….quickly.  Any fingers in the way will be squashed.

Ground anchor installation.

Not that easy.  I had to cut a square out of the wooden floor a good 6 “ bigger than the Anchor (to allow room for the chain)  THEN screw through the base of the unit –  a real pain to do and probably not worth the effort.

That’s the build complete.  Now in use.

Cracking unit in use.  A third tip here.  I forgot to run a line of silicone down the joins as per your instructions (missed that bit to be honest).  So, the 1st windy/rain day I had a leak through the roof (under the capping joint)  Not a huge leak but enough to annoy me.  I ran the silicone all around the unit retrospectively; luckily you supply clear silicone, so you can hardly see it.  From that moment on the unit was water tight.

I ordered your full shed pack, shelves, hooks and flooring.

The flooring – I thought this was too much money when I bought it, for what I thought was chipboard.  Then I tried to lift it.  What is it?  Its heavier that the rest of the unit put together.  Really good quality stuff.  Watch the fingers when dropping into place though!

Shelves – Well worth having – great for oils and tools.  If you are smart, you put a shelf low down and use it as a maintenance platform.

Hooks – really handy.  I ordered 10, seems a lot, but once you have a couple of back packs, a helmet and a few waterproof items up there, they soon fill up.

Another tip for your customers here.  Get to Wilkos and buy some plastic storage boxes (£6.00 each) divide your riding gear into winter and summer boxes and stack them.

As a maintenance shed

Really handy.  I do have a garage, but like most peoples its full of prams and tools, here in my “man zone” there is only bike gear.  I have a bike maintenance stand which I stand just outside the shed door.  Perfect I can keep out of the wind whilst I am prepping my bike.   I don’t bring the bike in as the oil would ruin the floor.

The shed gets a little warm in direct sunlight, so I don’t stay in there too long on nice days, on a cold day it’s a great shelter from the wind and rain.

In terms of security, I really have no worries at all.  This is a really solid unit, I can’t imagine anyone getting in without a metal saw.

Conclusion.  Great shed – but get a mate to help and for your own sanity buy an electric screwdriver.

I hope that is enough.  Feel free to use this review in any way you see fit”.

See the full range of Asgard cycle garages here.

Buyers Guide: Sports Equipment Storage

Whether you are a sports professional or amateur, many types of sports often involve various types of costly and often bulky equipment, clothing gear and supplies.  In particular, sports and outdoor activities, such as bikes, ATVs, fishing, snowboarding, skiing and golf, can be quite expensive and require adequate storage of all the related equipment. In this case, you may find that a dedicated outdoor storage unit will be ideal to keep all the sports equipment together.

Suitable storage facilities may be especially useful to sports and leisure centres, community centres, nurseries, schools and colleges, sports and golf clubs as well as for homes with enough outdoor storage space.  However, the main factor that will help you to make your decision will depend on the type of sports equipment that needs to be stored.

Here, we will give an overview of the key points to look out for a range of different outdoor sports activities and their storage requirements.

ATV/ Quad Bikes

Quad biking is great for those who like an exciting adventure outdoor sport.

Quad biking is great for those who like an exciting adventure outdoor sport.

Quad biking is a popular sport for those who enjoy the speed, freedom and the thrill of the ride.  But this popularity has a downside, with Quad bike theft increasingly common in the UK.  Because of this, quad bikes are known as “hot property” by the UK police.  So when getting an ATV, always make sure you have considered your bike security options

Size: The main concern here would be if the dimensions would be suitable to store your vehicle.  Look at the height of the unit, as well as the width and depth.  Shelves and hooks are an additional benefit to store your vehicle accessories.

– Accessibility – Look for units with easy large double door access, with ramps if possible in order for you to be able to drive your vehicle straight in

– Security:  With the number of quad bikes being stolen rising by 83% last year, make sure you have maximum security for your off-road vehicle.  As well as standard chain locks and ground anchors, a metal ATV storage unit would provide the most security.  If your existing garage or storage unit does not come with a robust security locking system, consider investing in additional locks and alarms to protect your property.

Power supply – An electric supply for recharging your vehicle and accessories is a bonus, so look out for any units, which have a power, supply option.

Ventilation: This would be quite important; your ATV needs somewhere cool and dry especially after being driven.  Be careful about wooden sheds as they may not be as safe as metal sheds, and are susceptible to damp and rotting over time.  In comparison, metal storage units are rust and weatherproof.

Asgard’s RecommendationThe Quad Bike Storage Unit

Fishing

Tha Catch of the Day!

Tha Catch of the Day!

Any keen angler will know how valuable fishing rods, reels and accessories are to the sport so need to be stored properly when not in use.  The main concerns for Fishing tackle storage would be the following areas:

Horse riding is great fun for all ages.

Although owning or caring for horse may be geat fun for people of all ages, Looking after horse usually means plenty of equipment – horse tack, clothing, including the bridle, saddle, bit, girths, cinches, saddle pads, lead ropes, halters, whips, stirrup irons and stirrup leathers, horse boots, the list goes on!  The main concerns for horse tack storage would be the following areas:

– Size:  This would depend on what you intend to store in the storage unit, so make sure you consider a sizable storage unit with plenty of storage space.  Check the height of the unit, as well as the width and depth before you buy.

– Storage – With so many different equipment, organisation is key.  It might also be worth checking to see the unit comes with additional saddle racks and shelving to ensure your equipment is stored safely and securely.

– Security:  As your equipment may be left outdoors in the farm or field, make sure you go for a Storage Unit that offers you maximum security. It is worth checking to see the security level on the storage unit before you buy.  We would recommend you to choose metal storage units as they can provide the most security, compared to wooden sheds.  If your storage unit does not come with a robust security locking system, consider investing in additional locks and alarms to protect your property.

– Ventilation: A Horse Tack storage unit will come in handy when storing a range of horse riding related gear and equipment.  Keep in mind that saddles, bridles and stirrups, and other items made of leather needs storing somewhere dry with a good circulation of air, as sealing it in an airtight box will cause condensation and mould.  This is especially important when storing in wooden sheds, as they may be susceptible to damp and rotting over time.  On the other hand, opt for galvanised steel metal storage units that guarantee to be rust and weatherproof.

Asgard’s Recommendation – The Trojan Horse Tack Storage Unit

♣ Skiing and Snowboarding

Winter Sports are cool!

Skiing and snowboarding and other winter activities tend to be seasonal sports, so unless you’re one of the lucky few who ski year-round, there comes a time at the end of every winter season when skis and boots must be tucked away in storage. Properly storing your snow gear in the off-season in a safe and protected manner will help you the following winter with equipment ready and prepped to hit the slopes.

Size: The main concern here would be if the dimensions would be suitable to store all your bulky snow equipment, as well adequate shelving and hooks to maximise the storage space available.  Look at the height of the unit to store your skis upright, as well as the width and depth.

Security: Winter sports gear is often quite expensive, and the combined costs of all the equipment will often add up to more then you think.  So it’s worth checking to see the security level on the storage unit before you buy.  We would recommend you to choose metal storage units as they can provide the most security, compared to wooden sheds.  If your storage unit does not come with a robust security locking system, consider investing in additional locks and alarms to protect your property.

Ventilation: Due to the nature of the sport, most equipment is quite hardwearing and durable.  However, before storing it for long periods of time, ensure it is clean and dry before putting it away.  This is especially important when storing in wooden sheds, as they may be susceptible to damp and rotting over time.  On the other hand, opt for galvanised steel metal storage units that guarantee to be rust and weatherproof.

Asgard’s Recommendation – The Trojan Skiing/Snowboarding Storage Unit

Caravan Site Storage – Reviews

The Asgard Caravan Storage Unit – Latest Customer Reviews

I am highly delighted with my purchase. The order was dealt with in a highly professional manner and delivered within the timescale.“The Asgard gas storage cabinet arrived as promised.  Good build quality and the brown paint finish looks perfect against the natural stone wall. I would definitely recommend this product

The erection of the shed was completed by extremely competent staff”.

“A very professional installation from a very professional company”. 

Caravan Site Storage Unit

Caravan Site Storage Unit

“Outstanding value for money”  “So much better than my old plastic unit. For a little bit more money get a metal unit which will last for years, why bother with plastic?”    “Delivered on time and complete”    “I was impressed by the size and weight, so easy to put together”  

What is the best way to catch burglars?

A news story has revealed how one home owner in London, caught a burglary suspect with a camera initially set up to film wildlife.  This story reveals just how useful these cameras can be in catching thieves and clamping down on burglaries.

If you’re worried about garden theft and burglary, this is one top security measure that we would recommend. If you are thinking about installing a home security camera system, location of your cameras is key.

Don't make it easy for thieves to get to your home

Don’t make it easy for thieves to get to your home

Choosing a security camera

When choosing your home security camera, check that you receive a clear image in both the day and night time. There are a variety of different security cameras available such as infra red security cameras, dome cameras, pro box cameras, pan tilt zoom cameras and hidden cameras. Each of these cameras will offer a different image quality and will meet different user needs.

When placing your security camera choose an area which is both high up and sheltered from the elements.  Placing your security camera near the roof will also give you the best view and reduce the risk of vandalism.  Make sure you fit enough cameras to cover all entrances to your home and garden.

Other ways to secure your home

Fitting security cameras is just one of the many ways that you can secure your home. We’ve come up with a number of tips to protect your home and garden from theft. 

How to build raised beds

If you want to do something new with your garden, building raised beds is a great idea. They are great for growing a wide range of plants, fruits such as strawberries, currants, raspberries and blackberries and almost any vegetable.

Raised beds allow you to:

  • Increase soil temperature
  • Improve drainage
  • Match soil type to the plant
  • Improve ease of access

Winter is a good time to build raised beds in preparation for spring.

How to build raised beds

How to build raised beds

Building your raised beds

Step 1: Choose the correct site

Choose an area clear of plants and remove any perennial weeds. You could also choose an area of lawn. For the framework you will need to use wood that has been treated against rot.

Step 2: Lay out your frame

When decided on the size of your raised beds, the length can be whatever you choose but it is advised that you keep the width to around 1.2m, so that you can easily reach around.

Lay out your wood and mark the corners with canes.

Step 3: Cut the bed

Remove your wooden boards and join the canes with string to mark out the position of your raised bed. If you are building your raised beds on grass, you will need to cut out the grass using a spade, with about 10cm on each side of the string. Slide the spade underneath the grass to cut pieces about 5cm thick. Take these cut out pieces and lay them evenly across the bed.

Step 4: Build the frame

Lay your wooden plants side-on along the bare earth outline you just created and join at each corner with one of two galvanised metal brackets.

Step 5: Fill with compost

Fill your bed with compost and compact it inside by treating it down. The middle of the bed should be slightly higher than the frame to allow for setting.

Step 6: Secure your frame

Hammer small sharpened pegs around our frame to help hold the boards in place.

Now you’re ready to plant!

Taking up cycling in the New Year

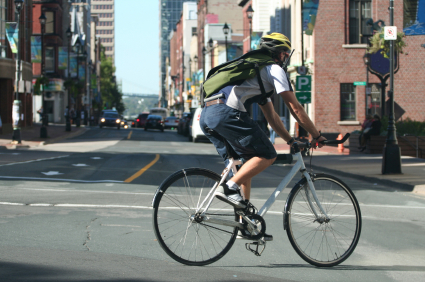
If you’ve decided that this year is going to be the year you start riding a bike, we’re here to support you. If you’re anything like me, you may not have even attempted to start your New Year’s resolution, but when it comes to riding a bike all you have to do is get on! Many of us haven’t cycled since we were children, if that’s you you’ll need to take the time to properly choose the right bike for you.

How to choose the perfect bike

Depending on what you’re planning to use your bike for, this will determine the type of bike you need. There are a few different types of bike to choose from:

Road bike

This is the term used for a traditional bicycle. As the name might suggest, these bikes are designed for good performance on roads. Two types of bikes fall under this category, racing and touring bikes. Racing bikes are designed for speed and performance, whereas touring bikes are designed sustained comfort.

cycle safe

Choosing the right bike for you

Mountain bike

These bikes are designed for off road use. The difference between these and road bikes is that mountain bikes have compact frames and higher handle bars, giving the rider a more upright position. There is a selection of different mountain bike types such as downhill or cross country.  A mountain bike is generally seen as a good all-rounder as they can be efficient on roads.

BMX bike

These are low profile bikes with 20 inch tyres. BMX bikes are used in competitions on trails and courses.

Once you’ve decided on the type of bike you need, you’ll have to make sure you get the correct size to fit you. Getting this right is essential as different bikes have different dimensions for varying body types. When trying out sizes, you’ll need to make sure that the straddle height isn’t too high so that mounting and dismounting is easy and comfortable.

Try before you buy to get a feel for your new bike and once you’ve purchased pay for a professional to assemble it. Now you have your bike, it is also a good idea to get some training on bike maintenance, so you know how to take care of your bike yourself.

Now all that is left is to go out and enjoy yourself!

Bike Storage in the snow

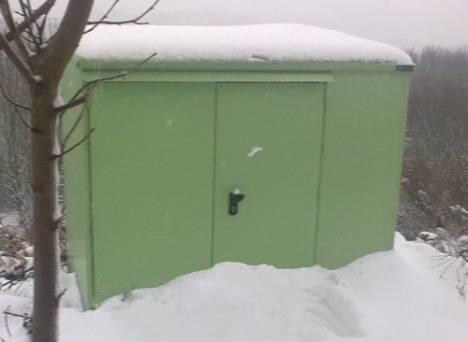
The weather has stopped a lot of people this week, so a great time to to test out your secure steel bike storage units.  A few customer photos of their Asgard sheds  in the snow.  Keep your bikes safe AND dry in an asgard secure steel bike store.

Bike Storage in the SNOW

The High Security Bike Store

Snow covered Asgard shed

The 4 bike store

Sheds and bike stores in the snow

The bike maintenance store

snow and asgard bike storage

Large Bike Store

Asgard Secure Steel Storage is a division of Flexiform Business Furniture Limited, a leading supplier of steel storage systems for over 30 years. Flexiform Business furniture is one of only 6 OGC/GPS appointed companies in the UK – This basically means we are accredited to supply goods to the UK government.  Asgard can draw on a wealth of metal fabrication experience and has a long history of engineering and manufacturing excellence.  Asgard now produce metal sheds, garden security storage of the highest quality.
Flexiform and Asgard work hand in hand supplying some of the largest government contracts through out the UK. As a business we are ISO 14001 and 9001 accredited  with prestigious, established clients such as The Parliamentary Works, West Yorkshire Police Force and many local authorities.  With an unrivalled reputation for quality and innovation you can be sure of our long term commitment to supplying quality products. Download Our Brochure.
Asgard have accreditations for just about everything.  All our products are UK designed and manufactured to meet these high standards.

The A-Z Guide of preparing your Motorbike for the Winter Season

As snow is beginning to fall across the UK, it’s time to tuck in your motorbike or moped in for the winter and say goodbye to another riding season.  But before you do, spend a little time giving your bike some TLC to protect it whilst it is in storage and to make sure it’s ready and good condition to ride for next spring.

Have your prepared your Motorbike for the Winter Season?

Have your prepared your Motorbike for the Winter Season?

Not sure where to start? We have put together an A-Z Guide for preparing your motorbike for the Winter Season.

Air Filter This is a good time to clean and change the air filter of your bike.
Aluminium / Chrome Parts and Rims Cleaning the chrome and aluminium parts, then coating them with a good chrome polish will keep these areas relatively clean, and easier for Spring clean-up. To keep the tarnish off (especially on the aluminium), a coat of silicone lube will give some protection (to be washed off in the Spring).
Battery Use a battery conditioner during the Winter months. Remove the battery from the motorcycle. Clean the terminals. Check the fluid level (add if necessary). Hint: Use a flashlight to shine through the case to view the level. Attach a Battery Tender/ Trickle Charge to keep the battery in good shape. Place the battery on a wood plank (not directly on concrete).
Belt Drive The belt is often ignored until there is a problem. Check the belt for signs of wear and damage, and clean the belt with mild soap and water when washing your bike. Towel dry while inspecting. Belts typically last in excess of 50,000 miles.
Compressor Make sure your tires are properly inflated. If you have a compressor then deflate your tires first to expel any moisture, then inflate with clean compressed air. You should repeat this step before riding again in the spring.If possible, elevate your bike so both tires are not under load. This is especially important if the bike will be stored in freezing conditions. Make sure your bike is secure. Motorcycle lifts with bottle jacks have been known to fail when left under prolonged load.
Drive Chain Adjust per the specification. If you have a chain drive, lube the chain with chain lube or even a light grease (leave a note to clean excess in Spring). Put newspaper or cloth under this area to catch the drips.
Exhaust Pipes Prevent any Insects and bugs climbing into Exhaust Pipes, so stuff a clean rag in the end of your pipe, or cover with a plastic bag (secured with a rubber band). Leave a note to remove the rags in Spring. Note: A touch of fuel oil or WD-40 on the cloth or shop towel will discourage most critters from making a home in the pipe (with the rag). Be cautious on the amount of fuel oil or oil used. Dampen, not soaked, then stuff in the pipe(s).
Frame (and other painted areas) Apply a coat of wax on the painted areas of a bike to keep condensation from damaging the metal. Note: The frame is often neglected, but it should be waxed prior to winter storage just like other painted parts.
Gasoline Run Carb(s) out of Gasoline before winter storage, and add some gasoline stabilizer to your tank per the instructions. Also change the filter plug when storing your bike away.
Helmet Liner There are products advertised to “freshen” your helmet that work okay. However, a simpler and cheaper method is to use a little Ivory dish soap or Dr. Bonner’s Peppermint Oil Soap and warm water along with a soft bristle brush to clean and refresh your helmet foruse in the Spring. Note: A damp cloth rubbed around the inside does wonders every week or so. Allow the helmet to dry before using.
Location Store your Bike away from the window (light fades paint and cracks leather).
Leather Eagle One Carnuba Leather Cream – This is one of the best leather conditioners on the market. No petroleum products added. Apply  this to your leather seat, tank (leather) bib, and backrest. Note: Several light coats are much better than a single heavy one. Buff with a soft cloth after the conditioner/cleaner has dried. Note: When your leather gets wet, a light coat of Lexol is an excellent way to condition and preserve the leather from water damage.
Mudguard Extenders Fit mudguard extenders to protect the bike from being ‘sandblasted’ by salt and road grit
Oil Change and Lube It is good to change motorcycle oil prior to Winter storage. Change, then run it for a few minutes to get the new oil coated on the engine.Also lube moving parts (cables, etc.) with recommended lubricants.
Radiator Check your radiator levels, add aluminium safe antifreeze as necessary.
Stabilizer Moisture collects during storage and fuel can go a little off because of it. Filling the tank, adding the stabilizer and running the engine for ten minutes can minimize this effect.
Storage Try not to cover your motorcycle with a cover as although it will protect the bike from dust, it will cause condensation from forming on your bike, but it keeps dust, etc. off your bike.Instead – Make sure you store your motorcycle in a safe and secure place.  If you don’t already have a suitable area, e.g. a garage or secure shed – the Asgard Motorbike Garage is a secure and convenient alternative.  For more information, visit the Asgard Motorbike Storage range here.
Temperature Gauge Take out your “temp gauge oil” dipstick (if you have one). Put in the original for the Winter. Store the “temp gauge” in a moderately warm place. Write down that you need to reinstall the dipstick in the Spring.  If you have other (removable) equipment, do the same with it. Exposing to extreme low temperatures may affect sensitive “gauges” during Winter months.
Tire Pressure Check the tire pressure. Adjust as needed and leave a note to check in Spring.
Vinyl Clean vinyl with a vinyl cleaner, then use a vinyl protector. There are several on the market. Buff with a soft cloth when dry.
Wash Bike Thoroughly Your motorcycle needs a thorough wash job before storage. Blow dry with a leaf blower, and then towel off excess water.
Windshield Splat! – This windshield cleaner is safe for windshields and does a great job removing bugs. Note: You need to get the bugs and bug parts off as soon as possible regularly.  As well as being harder to clean when dry, Bugs have chemicals that can etch your paint and damage your windshield.

(Article SourceMotorcycle Winterizing Tips )

Have any other suggestions for storing your winter bike? Share your hints and tips with us by commenting below and we will add it to our Guide.

How to clean your bike

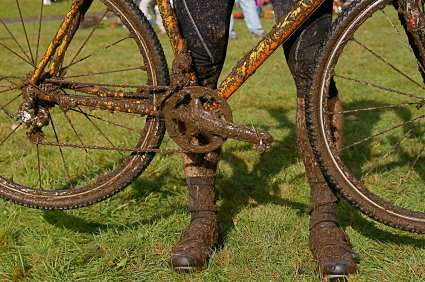
With the wetter weather your mountain bike rides on off road and on trails are becoming muddier than ever. Cleaning your bike, just for it to get muddy again may not make a lot of sense but it’s certainly the best thing to do, if you want your mountain bike to stay in a good condition and run smoothly.

Get prepared for a dirty job with the correct cleaning supplies

To clean your bike, there are a few supplies that you will need:

  • 1 bucket
  • Hot water
  • Washing up liquid
  • Sponges, brushes and cloths
  • Chain scrubber
  • toothbrush
  • Chain lubricant
  • Degreasing solvent
  • Repair stand (if you have one, makes cleaning the bike much easier)

Time to clean? Where to start?

Clean

The first thing you should do is remove items such as leaves that may have gotten caught in your bike. Wipe down the entire bike with soapy water and apply a degreaser to the drivetrain. Gently use your sponges, brushes and cloths to get rid of any mud and grit. Scrubbing too hard could damage your bikes paintwork. If you have a repair stand, use this to remove the wheels and clean these separately.

Use a toothbrush to scrub the chain and rear cassette, use a rag to wipe the chain clean and remove any excess dirt. Once you have done this backpedal the chain through a rag covered in degreaser.

Wash the rest of your bike with a soap and water mix and rinse it down with an ordinary garden hose. Do not use a high pressure hose or power washer on your bike, as water may push itself past the bearing seal and this may cause corrosion.

Lubricate

When your bike has dried, you will need to lubricate the chain, cables, levers, shifters, derail pulleys and pivot points. Never use an ordinary household lubricant on your bike, you should always use a lubricant purposely made for bike chains. In autumn weather a wet condition lubricant would be the best choice for your bike, due to the amount of rainfall that usually occurs. Make sure any excess lubricant is wiped off the bike as this can attract dirt.

While you are cleaning your bike, it’s a good idea to check for signs of damage on wheel rims, spokes, spoke holes and tyres. Now is a good time to give your bike a general inspection and feel free to give the bike frame a good buff, to get it shining. Once you’ve cleaned your bike, you’ll be surprised at how good it feels to get back on it, not only will it look great, it will certainly feel it too.

The perfect place to carry out that necessary bike maintenance

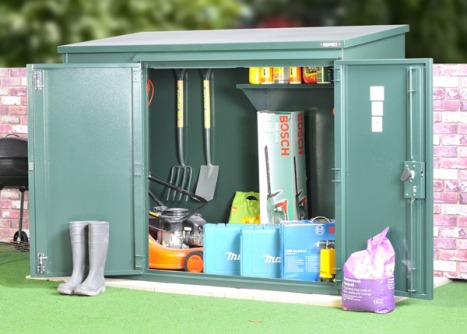
You will need to have a decent amount of outdoor space to clean your bike and doing this inside obviously isn’t an option, unless you like mud coloured carpets! Having somewhere to store all of these bike cleaning and maintenance items is also a good idea. A garage is a good place to store all of your bike maintenance equipment, accessories and of course your bikes. If you don’t have a garage, there are a variety of garden bike sheds and cycle storage units available on the market. The bike maintenance garage by Asgard has been designed to do just that! This is a large cycle garage that can hold up to 6 bikes, with shelves and hooks to maximise storage space and it is large enough to carry out necessary bike maintenance. The cycle garage is made from strong weatherproof steel, so your stored items will be safe and dry. Having all of your bike items stored under one roof is a lot less hassle than traipsing in and out of the house every other minute for items you’ve forgotten.

National Home Security Month: Outdoor Security

It’s the 4th week of National Home Security Month. This week is focussed on outside protection and as you know, here at Asgard we know all about that!  During the winter it is especially important to keep your outdoor items safe and secure, as the cover of darkness gives burglars and thieves more opportunities to strike.

Garden sheds and garages are easy targets for thieves, as they can be quickly broken into without disturbing the household. These type of thieves can strike without you even knowing its happened, so it is important to make sure you have provided your garden shed or garage with the best possible defences.  Think of all of the expensive equipment you have stored inside your shed, power tools, lawnmowers, bikes and the children’s toys. These would be costly to replace and your insurance may not cover it.

Don't make it easy for thieves to get in your garden shed

Don’t make it easy for thieves to get in your garden shed

How to keep your garden shed or garage safe:

  • Always lock your shed/garage – this is simple and easy to do, but you’d be surprised at how many people forget.
  • Secure shed doors by fitting a strong hasp and staple.
  • Secure shed door hinges with coach bolts or non-turnable screws.
  • Replace any rotten wood – as this is easy to break.
  • Fit alarm to your garage or shed – try this motion sensor alarm.
  • Chain items such as bikes, ladders and lawnmowers to a strong anchor point.
  • Mark all items in your shed with your postcode.
  • Check that your insurance covers your shed/garage.

If your garden shed isn’t up to the task of storing your items securely and you want to increase the security of your items, then an Asgard high security garden shed is what you need. These tough metal storage units have been designed to stop thieves in their tracks and leave your garden items safe!

High security garden storage.

High security garden storage.

Asgard high security garden sheds are available in a selection of sizes and have been approved by the Loss Prevention Certification Board to Level 1, which may help to reduce insurance premiums.  To keep all of your items safe, these sheds are made from weatherproof steel and are fitted with a number of heavy duty features including a 5 point locking system and reinforced components.